Below shows you how to create a route based vpn upon a Netscreen firewall using the firewalls gui interface.
This tutorial was created using the ScreenOS version 6.2.0r1.0.
The encryption domain for this guide will be,
- Local Gateway : 1.1.1.1
- Local Endpoint : 10.1.1.25/24
- Remote Gateway : 192.168.1.107
- Remote Endpoint : 172.28.16.0/24
Create Tunnel Interface
- Go into “Network | Interfaces”
- Select “Tunnel IF” from the drop down and click New
- Enter the tunnel interface Name (number)
- Select the Zone. This will be the outgoing zone and the corresponding Virtual Router.
- Select Unnumbered and select the interface. This will be your local interface that the un-encrypted traffic will arrive on.
Add the GW
- Goto “VPNs | AutoKey Advanced | Gateway” and select new
- Enter the “Gateway Name”
- Select “Static IP address” and add the IP

- Select “Adavanced”
- Enter your “Preshared Key”
- Select your “Outgoing interface”. This will normally be your Untrust interfcae.
- select “User Defined | Custom” and select your Phase 1 proposal.
- Select “Return”
- Select “OK”

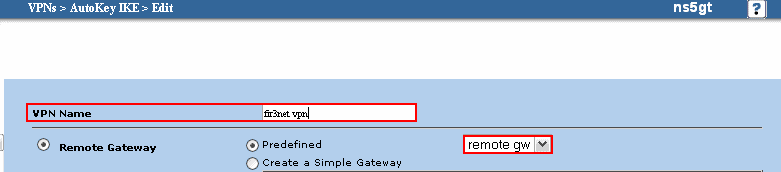
Configure Phase 2
- Click “VPNs | AutoKey IKE | New”
- Add your “VPN name”
- Select your gateway
- Click “Advanced”
- Select “User defined | Custom”
- Select your Phase 2 Proposal
- Select Bind to “Tunnel Interface” and select your Tunnel Interface you created earlier.
- Select “Proxy-ID” and add your Local and Remote IP`s.
- Select “Return”
- Select “OK”

Add Policy
- Create a new policy from “trust to untrust”
- Add your source and destination addresses and select “Position at Top”
- Select the Action as “Permit”.
- Click “OK”
- Create another policy for traffic going the other way.
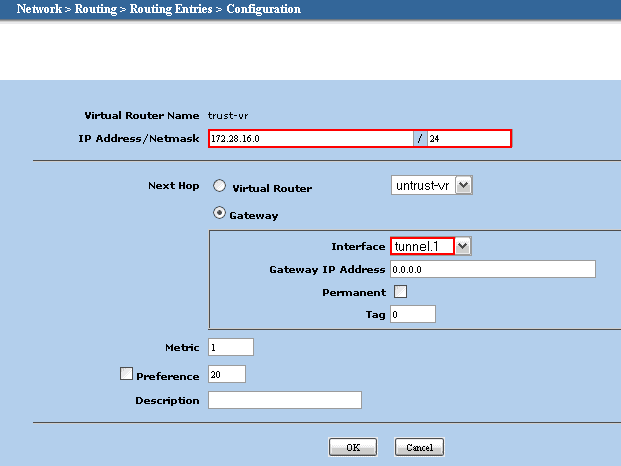
Add a route
- Create a route within the required Virtual Router (default is trust-vr) for the remote end point.
- Select the next hop as gateway.
- Then select your tunnel interface from the drop down.

Rick Donato is a Network Automation Architect/Evangelist and the founder of Packet Coders.
Latest posts by Rick Donato (see all)
- NETCONF & YANG: Automate Network Configs via Python - April 2, 2026
- Palo Alto – How to Configure Your Next-Generation Firewall - April 2, 2026
- How to Harden Linux SSH: Keys, Fail2ban & Ciphers - March 1, 2026
Want to become an IT Security expert ?
Here is our hand-picked selection of the best courses you can find online:
Internet Security Deep Dive course
Complete Cyber Security Course – Hackers Exposed
CompTIA Security+ (SY0-601) Certification Complete course
and our recommended certification practice exams:
Delta Practice Tests