In order to to allow domain based objects through a Check Point firewall we need to understand how the domain objects actually work.
When a packet hits a rule with a domain based object the Check Point does a reverse DNS looking up on the IP address against the domain object to see if they match, and if not the packet is dropped. Not only can this cause a number of issues but it can cause massive performance implications (further details see sk41632).
Below takes a closer look at this process.
When a packet hits a rule containing a domain based object the firewall queries the PTR record against the packets IP to see if it matches the domain name provided in the domain object.
Below you can see the DNS process of a domain object using ftp.symantec.com.
Note : Firewall IP = 22.19.1.1 | DNS Server = 2.2.2.2.
22.19.1.1.32874 > 2.2.2.2.domain: 40818+ PTR? 171.22.67.77.in-addr.arpa.
2.2.2.2.domain > 22.19.1.1.32874: 40818 NXDomain q: PTR? 171.22.67.77.in-addr.arpa. 0/1/0 ns: 7
7.in-addr.arpa
Now this can cause problems if the PTR record doesn’t match the domain name of the A Record as the Check Point Firewall will drop the traffic believing that the destination you are trying to reach isnt that of the Domain object.
Note : You can also spot the PTR record being displayed rather then the domain name of the object as the destination name within the logs when troubleshooting these kind of issues. This is a quick and easy step to confirm that the PTR record doesn’t match your domain name.
Another way to to check your PTR record is via the following steps :
[Expert@fw]# dig a ftp.symantec.com +short
ftp25280.symantec.edgesuite.net.
25280.ftp.download2.akadns.net.
25280.ftp.download.akadns.net.
171.22.67.77
213.248.114.171
[ dig -x 213.248.114.171 +short
213-248-114-171.customer.teliacarrier.com.
A number of companies will have PTR records that do not match their domain name (A record), which when trying to allow access through a Check Point can cause issues as the Firewall will just drop the traffic.
Solution
The best solution to resolve this issue is to have your traffic pass via an internal proxy. Proxies are designed and better suited for allowing and denying such traffic compared to a Check Point Firewall. Also there are massive performance issues with using Check Points domain objects and URI resources.
If you are unable to use an internal proxy then there are 2 alternatives. These are based on using the built in security servers within the Check Point Firewall as shown below.
FTP
Within Check Point you can configure a FTP resource. This allows you to configure a path which can then be denied or allowed within a rule. The problem with this is that you cannot specify the host but only the path.
Below shows you the steps :
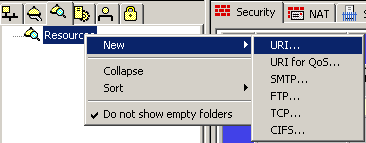
1. Create a new FTP resource
2. Assign the FTP Resource a name
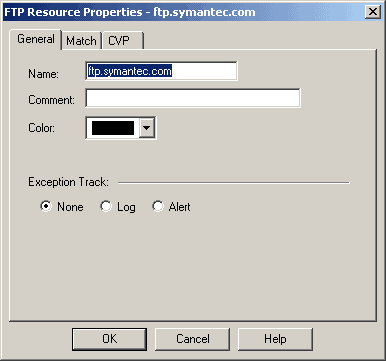
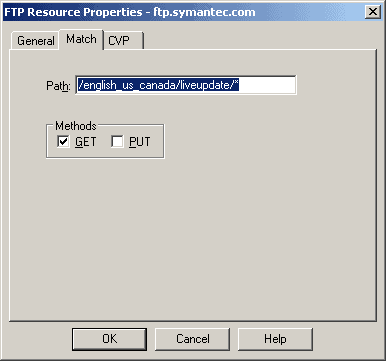
3. Assign a path and the action method(s).
4. Right click on a new rule and select Service with Resource.
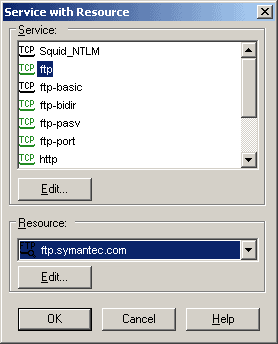
5. Then add the rest of the actions to the rule such as source and destination etc.

HTTP
The HTTP security server gives you much more options. Below shows you the steps :
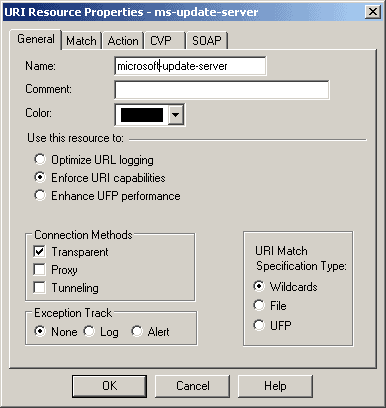
1. Create a new HTTP resource
2. Add a name and the connection method(s). These are based on the following :
- Transparent – This means that the security server is invisible to the client that originates the connection, and to the server. The Transparent connection method is the most secure.
- Proxy – This allows the Check Point to receive proxied traffic (from the client) and relay it through to the HTTP security server.
- Tunneling – This is used for connections that cannot be examined by VPN-1 such as HTTPS. Due to this only the hostname and port number is checked. This is the least secure of the connection methods.
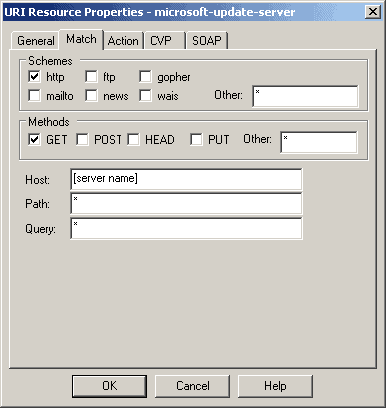
3. Select HTTP, the method and the hostname of your server.
4. Right click on a new rule and select Service with Resource.
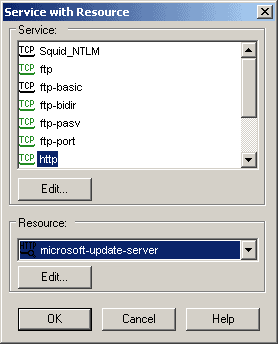
Then add the rest of the actions to the rule such as source and destination etc.


- NETCONF & YANG: Automate Network Configs via Python - April 2, 2026
- Palo Alto – How to Configure Your Next-Generation Firewall - April 2, 2026
- How to Harden Linux SSH: Keys, Fail2ban & Ciphers - March 1, 2026
Want to become an IT Security expert ?
Here is our hand-picked selection of the best courses you can find online:
Internet Security Deep Dive course
Complete Cyber Security Course – Hackers Exposed
CompTIA Security+ (SY0-601) Certification Complete course
and our recommended certification practice exams:
Delta Practice Tests